Disclosure: I am compensated for purchases made through some links on this site. Click for details.
Hailstones, those balls of ice that fall during intense storms, seem harmless enough. But with hail reaching sizes of golf balls or even baseballs, the impact it delivers to your roof can inflict serious destruction. Left unaddressed, what may appear as minor dings or surface nicks can escalate into substantial structural issues. This article offers homeowners an in-depth guide explaining hail damage, identification tips, severity factors, insurance insights, and most importantly—how to protect your home’s roof against seasonal hailstorm assaults.
What is Hail Damage to Roofs?
Hail damage occurs when precipitation from thunderstorms solidifies into balls of ice mid-air before barraging your roofing materials at high speeds. The most immediate visible destruction typically includes:
- Shattered or cracked shingles
- Pocked imprints and holes
- Stripped granule surfaces leaving ragged bald patches
However, the longer-lasting havoc hail wrecks lie in accelerating wear and tear to your roof. Battered surfaces weather faster. Gaps invite water seepage decaying sub-structure lumber. In addition, sun exposure degrades composition materials once protective mineral granules get whisked away. This gradual yet unrelenting deterioration expedites the aging process, often necessitating entire roof replacement years ahead of schedule.
Identifying Hail Damage on Your Roof
Many homeowners remain wholly unaware of hail damage until they spot stains on ceilings from leaky roofs. Yet long before reaching this stage, telltale signs of hail’s impact litter the roof. Know what to look for:
- Fractured or loose shingles often with frayed edges
- Sheared mineral granules gathered in gutters/drains
- Random pockmark patterns or depressed dents
Use binoculars and get up on a ladder to inspect closely, paying special attention around vents, chimneys, and skylights where both damage and deterioration typically concentrate due to material intersections.
Signs of Broken or Cracked Shingles
Identifying hail damage begins with a close inspection of your roof’s shingles. Hail damage often manifests as distinct patterns of broken or cracked shingles. These damages may appear as small punctures, cracks running across the shingles, or even pieces of shingles missing. To spot these damages:
- Visual Inspection: Conduct a thorough visual inspection from the ground with binoculars. Look for areas with missing shingles or visible cracks.
- Close-up Examination: If safe, use a ladder to get a closer look at your shingles. Check for any cracks or splits, particularly in areas where hail impact was most likely.
- Touch Test: Gently run your hand over the shingles to feel for irregularities or roughness, indicative of cracks or breaks.
Detecting Roof Dents
Dents on the roof are another telltale sign of hail damage, particularly on metal roofs or roofs with softer materials. These dents can be subtle and might not be immediately noticeable.
- Look at an Angle: View your roof from different angles. Dents are often more visible when light hits the roof at a certain angle.
- Use Chalk: Lightly dusting the roof with chalk can help make dents more visible. The chalk will adhere differently to dented areas.
- Soft Touch: Gently press along the roof surface. Areas with dents might give in slightly under pressure.
Granule Loss and Its Implications
Granule loss is a significant indicator of hail damage. These granules protect the shingle from UV rays and weathering.
- Check Gutters and Downspouts: After a hailstorm, inspect your gutters and downspouts for accumulated granules.
- Bald Spots on Shingles: Look for areas on shingles that appear smoother or ‘bald’ compared to the surrounding areas.
- Reduced Shingle Integrity: Shingles with significant granule loss are more vulnerable to weathering and may have a shortened lifespan.
- Missing Granules: Check valleys and protrusions carefully for exposed areas lacking protective granules. Dark blotches or spots indicate sections battered by hail.
The pattern of damage provides clues regarding a hailstorm’s direction and ice density. However, hail falls randomly. One house may show roof decimation while a neighbor remains untouched. If unsure, consult professional roof inspectors to identify any issues.
Table 1: Roof Inspection Checklist Table
| Checklist Item | Description | Notes |
|---|---|---|
| Broken Shingles | Look for cracks, splits, or missing pieces | Use binoculars for distant inspection |
| Dents | Check for indentations on the surface | Especially important for metal roofs |
| Granule Loss | Inspect for bald patches on shingles | Indicates weakening of shingle integrity |
| Gutter Damage | Look for dents or accumulated granules | Suggests hail impact |
| Structural Integrity | Ensure no sagging or deformation of the roof | Sign of underlying damage |
Severity Factors of Hail Damage
The extent of hail damage determines your repair or replacement options. Assess damage by looking for:
Minimal Damage: 10 shingles or fewer cracked or having indentations fit this category. Damage remains minor and has not compromised roof integrity. Replacing individual shingles offers a cost-effective fix until the roof gets replaced at the end of its lifespan.
Moderate Damage: Between 10 to 50 damaged shingles fall into this range. At this point, replacing entire sections where hail hit proves necessary. Center units and consult professional roofing estimates for repair costs versus new installation.
Extensive Damage: Signs of damage to most shingles indicate major destruction to the entire roof’s structure. At this point, patching fails to provide a long-term solution. A full roof replacement remains the best option to prevent leaks, protect the home’s interior, and maximize the return on storm restoration dollars.
Variables Affecting Hail Damage
The severity of hail damage on a roof is influenced by several factors:
- Roofing Material: Different materials have varying resistance to hail. Asphalt shingles, for example, are more susceptible to damage than metal roofing.
- Age of Roofing Material: Older roofs are generally more vulnerable to hail damage.
- Roof Slope: The angle of your roof affects how hail impacts it. Steeper roofs may have less damage compared to flatter ones.
- Quality of Construction: Well-constructed roofs can withstand hail better than those with poor construction.
- Hail Size, Density, and Shape: Larger, denser, and irregularly shaped hailstones cause more damage.
- Velocity and Angle of Hail Fall: The speed and angle at which hail hits the roof also play a significant role in the extent of damage.
Understanding the Impact of Hail Size
The size of hailstones is a critical factor in determining the extent of roof damage.
- Small to Medium-Sized Hail: Hailstones around ¾ inch to 1 inch can cause minor to moderate damage, often impacting granules and shingles.
- Large Hailstones: Hailstones larger than 1 inch are more likely to cause significant damage, including cracks, breaks, and even punctures in the roofing material.
Table 2: Hail Size and Potential Damage Table
| Hail Size (Diameter) | Common Comparisons | Potential Roof Damage |
|---|---|---|
| < 0.75 inches | Pea-sized | Minimal or no damage |
| 0.75 – 1 inch | Penny or quarter-sized | Moderate damage, minor shingle damage |
| 1 – 1.75 inches | Golf ball-sized | Significant shingle damage, dents in metal roofs |
| > 1.75 inches | Tennis ball to baseball-sized | Severe damage, broken shingles, risk of leaks |
Assessing the Extent of Roof Damage
Following impact, gauge damage into two broad categories:
Cosmetic Damage: Surface issues that are largely aesthetic like chipped materials or slight dings. These don’t impair function.
Functional Damage: Impaired ability to waterproof and weatherproof. Seen through punctured/missing shingles, change in roof contour, and sunlight peeking through gaps. Require prompt repair to prevent worsening leakage, rot, and structural weakness over time. Random strike patterns help distinguish hail compared to uniform wear from age seen across the entire roof.
Understanding whether hail damage causes one or both types aids decisions around roof repair, partial fixes or complete tear-off and replacements.
Checking for Hail Damage
Conduct routine visual checks yourself using binoculars or ladders with basic poke and prod testing. Many issues hide unseen without close-up inspection. But for comprehensive and technical analysis, hire reputable professional residential roof inspectors, especially after severe thunderstorms. They know examination nuances that the untrained eye can’t discern. Ensure assessors check flashings, undersides, attic interiors, and visible roof decking for concealed damage. Missed warning signs get exponentially costlier if left to spread.
Steps to Check for Hail Damage on Roofs
Professional Inspection vs. DIY Checking
When it comes to assessing hail damage on your roof, there are two primary approaches: Professional Inspection and DIY Checking. While a DIY check can be a good initial step, the expertise of a professional roofer is invaluable, especially for comprehensive assessments.
- DIY Checking: Suitable for initial assessment. Use binoculars to spot visible damages like broken shingles or dents. However, this approach has limitations, especially for detecting subtle or internal damages.
- Professional Inspection: Recommended if you suspect significant damage or for a thorough examination. Professionals have the expertise and equipment to identify all extents of hail damage accurately. They can also safely navigate roofs, which is crucial for steep or high structures.
Common Signs of Hail Damage
To effectively check for hail damage on your roof, be on the lookout for these common signs:
- Dented Gutters and Downspouts: Check these areas for dents or dings, which can indicate hail impact.
- Damage to Siding and Windowsills/Casings: This can be a precursor to roof damage.
- Random Damage Pattern: Hail damage typically has a random pattern of strike marks.
The Importance of a Thorough Inspection
A thorough inspection is crucial to uncover all hail damage, which can often be hidden or not immediately apparent. This involves examining not just the roof surface, but also the gutters, vents, and even attic spaces for leak signs. Ensuring a comprehensive check helps in accurate damage assessment and aids in the effectiveness of subsequent repairs.
Repairing Hail Damage on Roofs
Accurate Damage Assessment
Correctly identifying hail damage is the first step toward effective repair. This involves distinguishing between superficial and deep damage. Superficial damage may affect the appearance but not the functionality of the roof, whereas deep damage can compromise the roof’s integrity.
- Document Damage: Take photos or videos of the damage for insurance claims.
- Seek Professional Opinion: Have a professional roofer confirm your findings and advise on the best course of action.
Distinguishing Hail Damage from Other Roof Issues
Hail damage can sometimes be confused with damage from other sources. For example, exposure to the sun and wind can also cause similar wear on shingles. Hail damage typically presents as punctures, cracks, or shingles that have lost granules, whereas wear from aging often shows more uniform patterns of deterioration.
Preparing for Roof Repairs
Before commencing repairs:
- Contact Your Insurance Company: Inform them of the damage and discuss claim procedures.
- Choose a Reputable Contractor: Select a contractor experienced in hail damage repair. Ensure they are licensed and insured.
- Get a Detailed Estimate: Obtain a comprehensive estimate that outlines the scope of work and costs involved.
Table 3: Comparison Table of Roofing Materials
| Roofing Material | Hail Resistance | Longevity | Cost Estimate | Maintenance Needs |
|---|---|---|---|---|
| Asphalt Shingles | Moderate | 15-30 years | Low to moderate | Regular inspection, debris removal |
| Metal Roofing | High | 40-70 years | High | Occasional inspection, dent repair |
| Wood Shingles | Low | 20-40 years | Moderate to high | Regular treatment, inspection for rot |
| Slate Roofing | High | 50-100 years | Very high | Minimal, but difficult to repair |
| Rubber Roofing | Moderate to High | 30-50 years | Moderate | Inspection for punctures and tears |
Maintenance Tips: Preventing and Mitigating Hail Damage
After understanding the impact of hail damage and learning how to deal with it, it’s equally important to know how to prevent or at least mitigate future hail damage. Regular maintenance is key to keeping your roof in top condition and reducing the risk of severe hail damage. Here are some valuable maintenance tips:
- Regular Inspections: Schedule regular professional inspections, especially after severe weather seasons. This helps to identify and address minor issues before they escalate.
- Prompt Repairs: Address any roof damage or wear and tear immediately. Even small issues can become serious vulnerabilities during a hailstorm.
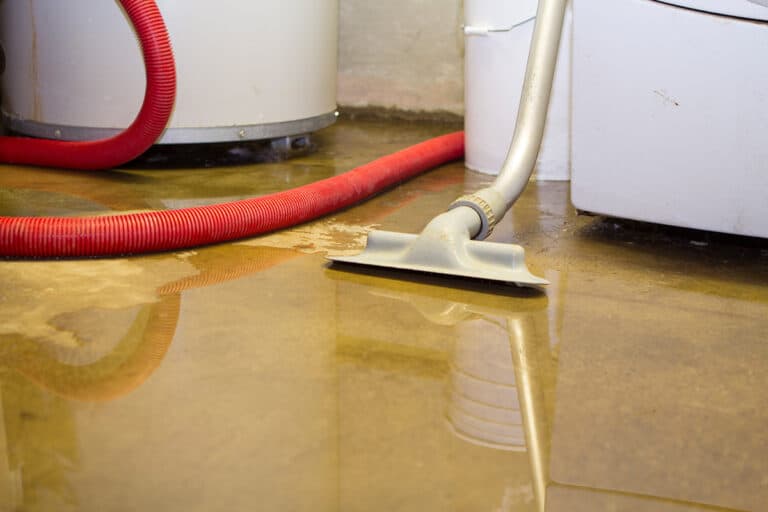
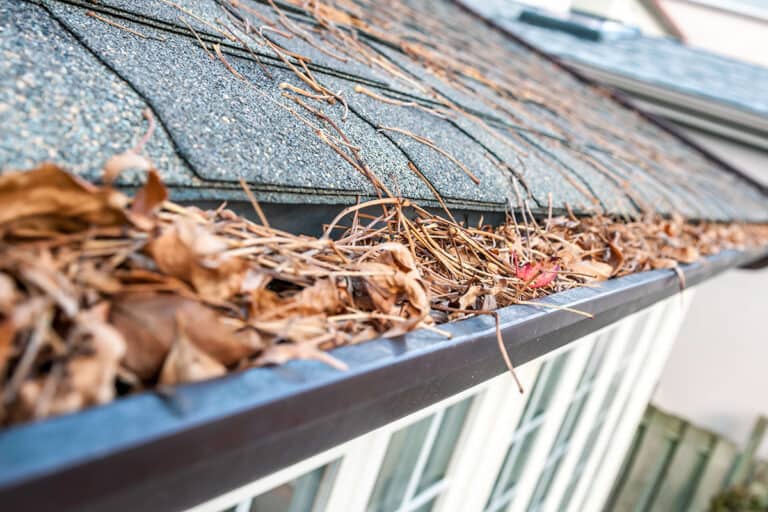
- Clean Gutters and Downspouts: Ensure that gutters and downspouts are free of debris. This helps prevent water buildup and damage during a hailstorm.
- Trim Overhanging Branches: Keep tree branches trimmed away from your roof. This reduces the risk of branches falling and damaging the roof during storms.
- Check Roof Ventilation: Proper roof ventilation prevents heat and moisture buildup that can weaken the roof structure over time.
- Invest in Hail-Resistant Materials: When replacing your roof, consider using hail-resistant roofing materials. These are specially designed to withstand hail impacts better.
- Apply Roof Coatings: Certain coatings can be applied to existing roofs to increase their resistance to hail damage.
- Stay Informed About Weather Forecasts: Being aware of potential hailstorms can help you take precautionary measures, like covering skylights or temporary reinforcements.
- Educate Yourself on Roof Maintenance: Understand your specific type of roofing and its maintenance needs. Different materials may require different care strategies.
- Consult Professionals Regularly: Don’t hesitate to seek advice from roofing professionals. They can provide personalized recommendations based on your roof’s condition and local weather patterns.
Table 4: Roof Maintenance Tips Table
| Frequency | Maintenance Activity | Purpose |
|---|---|---|
| Monthly | Gutter cleaning | Prevent water buildup and damage |
| Bi-annually | Professional roof inspection | Early detection of potential issues |
| Annually | Trim tree branches | Reduce the risk of physical damage |
| Post-Storm | Quick visual inspection for obvious hail damage | Prompt action in case of visible damage |
| As Needed | Repair of minor wear and tear | Maintaining roof integrity |
Hail Damage Insurance Claims
Understanding Insurance Coverage for Hail Damage
Hail damage is typically covered under standard homeowners’ insurance policies, but it’s essential to understand the specifics of your coverage. Most policies cover the structure of your home and will pay to repair or replace the roof if it’s damaged by hail. However, coverage limits and deductibles can vary. Some policies cover the replacement cost of the damaged roof, while others may only cover the depreciated value, considering the age and condition of the roof at the time of damage.
Limitations and Exclusions in Coverage
Be aware of certain limitations and exclusions in your insurance policy. For instance, if your roof was already in poor condition or beyond its lifespan before the hail damage occurred, your claim might be denied. Also, some policies have specific clauses for hail damage, such as higher deductibles for hail or wind damage. It’s crucial to review your policy in detail and understand these nuances to avoid surprises during the claim process.
Navigating Roof Insurance Claims
Filing a successful hail damage roof insurance claim involves several steps:
- Document the Damage: Take clear photos or videos of all hail damage.
- Report Promptly: Notify your insurance company as soon as possible to start the claims process.
- Keep Records: Maintain detailed records of all communications with your insurance company.
- Get a Professional Inspection: Have a professional roofer inspect the damage. Their report can provide supportive evidence for your claim.
- Review the Claims Adjuster’s Report: Ensure that the adjuster’s report is thorough and accurate. Don’t hesitate to ask questions or dispute any discrepancies.
Table 5: Insurance Claim Steps Table
| Step Number | Action | Description |
|---|---|---|
| 1 | Document the Damage | Take photos or videos of hail damage |
| 2 | Notify Insurance Company | Report the damage promptly |
| 3 | Professional Roof Inspection | Get a detailed report for the insurance claim |
| 4 | Review Adjuster’s Report | Ensure all damage is accounted for |
| 5 | Claim Filing | Submit necessary documentation |
| 6 | Follow-Up | Keep in touch with the insurance company |
FAQs About Hail Damage Roof Repair
Here are answers to some frequently asked questions homeowners have regarding hail damage roof repair and insurance claims:
Conclusion
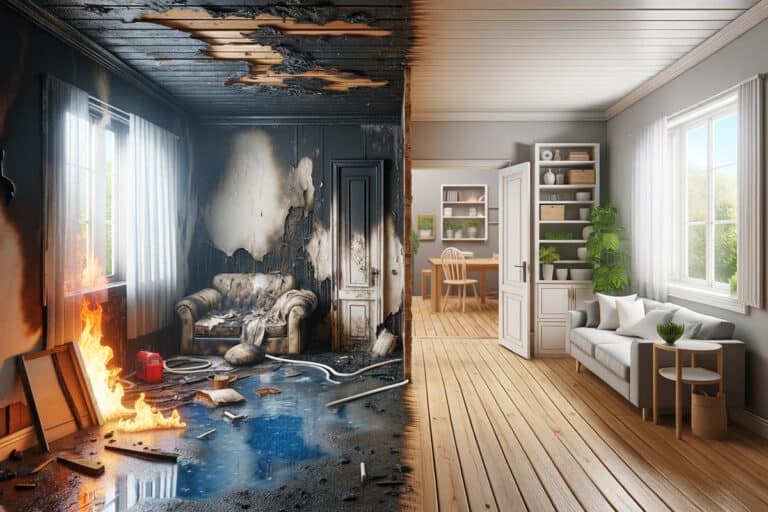
Your roof serves as the first line of defense, shielding everything within your home from weather damage. Ignoring hail or deferring repairs allows further destruction every time storms blow through. Regular inspection and proactive maintenance ensures your roof continues providing maximum protection for decades to come.
Don’t wait until leaks appear inside your living room to take action after hail wreaks havoc on your home’s exterior. Knowing what hail damage looks like, evaluating if and when repairs or replacement provide the smartest options, and working constructively with insurance representatives allows you to secure your most valuable investment – your house.