Disclosure: I am compensated for purchases made through some links on this site. Click for details.
Over 200,000 homes suffer drywall water damage each year from floods, leaks, and humidity. Unaddressed, moisture in walls and ceilings can encourage mold growth, compromise structural integrity, and require expensive repairs. This comprehensive guide covers recognizing signs of water damage early, evaluating appropriate response levels, executing DIY fixes, or calling specialists for major remodeling.
What Causes Drywall Water Damage
Water most often trickles into drywall through two paths – sudden flooding or gradual seepage over time:
Sudden Flooding
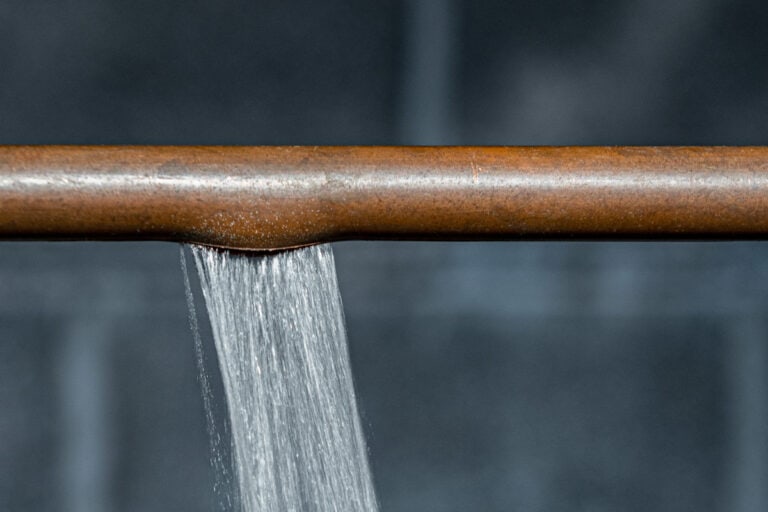
Heavy rains, burst pipes, and overflow from appliances/fixtures can quickly overwhelm an area, leaving drywall sodden. For instance, one ruptured pipe can dump hundreds of gallons of water into a home in less than an hour. Storm flooding also rushes in surprisingly fast. These deluges soak building materials saturated in short order.
Slow Leaks & Moisture Buildup
Over time, water stealthily penetrates drywall from smaller but steady sources including:
- Leaky plumbing joints
- Outdated washing machines slowly releasing water
- Gutter issues backing moisture into siding
- Downspout leaks dripping behind walls
- Basement humidity migrating into interior walls
- Steam from showers condensing on cool surfaces
Catching either occurrence early minimizes the overall square footage impacted and better contains hazards like mold.
Table 1: Root Cause Analysis Table
| Signs of Damage | Potential Root Causes |
|---|---|
| Ceiling stains | Roof leak, loose flashing, clogged gutters/downspouts |
| Upper wall stains | Plumbing leaks, overflow from tubs/sinks, condensation |
| Lower wall stains | Ground settling, flooded landscaping, foundation cracks |
Signs of Water Damage on Drywalls
Detecting symptoms early allows for quicker response before destruction escalates:
Visual Signals
- New stains, especially on ceilings
- Paint darkening, appearing stained
- Bubbling, peeling, or warped paint
- Peeling wallpaper or curling corners
- Drywall feeling spongy, soggy, or soft to the touch
- Flaking or mold starting to form
Hidden Indicators
- Stale “wet” smell
- Higher indoor humidity
- Condensation beading on windows
- Musty odor if mold takes hold
If you spot these signals, act quickly to determine the necessary response.
Table 2: Signs of Water Damage Checklist
| Visual Signs | Hidden Indicators |
|---|---|
| New stains on ceilings or walls | Stale “wet” smell |
| Paint darkening or appearing stained | Higher indoor humidity |
| Bubbling, peeling, or warped paint | Condensation on windows |
| Peeling wallpaper or curling corners | Musty odor indicating mold |
| Drywall feeling spongy, soggy, or soft | |
| Flaking or mold formation |
DIY Repairs vs. Professional Drywall Water Damage Repair
Once you detect potential signs of water damage, evaluate next steps:
Consider DIY If:
- Damage appears isolated or minor – less than 10 sq ft
- Drywall still feels structurally firm and firmly intact
- No electrical or HVAC lines run through the affected areas
- No visible mold is present
Call Water Damage Professionals If:
- Multiple rooms or floors impacted
- Drywall/wood framing is crumbling
- Black mold spotted anywhere
- Significant flooding exceeding 48 hours
- Unsure if DIY handling is safe/wise
DIY Repair Cost Savings
You can realize significant savings doing minor drywall repairs yourself vs. hiring contractors. Realistic DIY cost ranges:
- Small holes or sections less than 1 sq ft: $10 to $30
- Larger patches up to 4’ x 8’ sheet: $30 to $50
- Textured ceiling patch up to 2’ x 2’: $70+
Compare that to professional hourly service rates of $50 to $100 per hour. Add material costs on top.
Factor the repair’s complexity, your DIY comfort level, accessibility challenges, and time involvement when deciding whether to tackle personally or hire out.
Mold growth, in particular, poses major health risks and often requires hazmat-level remediation. Don’t take chances or hesitate to call experts regarding containment, purification, demolition considerations and Code-compliant structural repairs.
Hiring Water Damage Repair Contractors
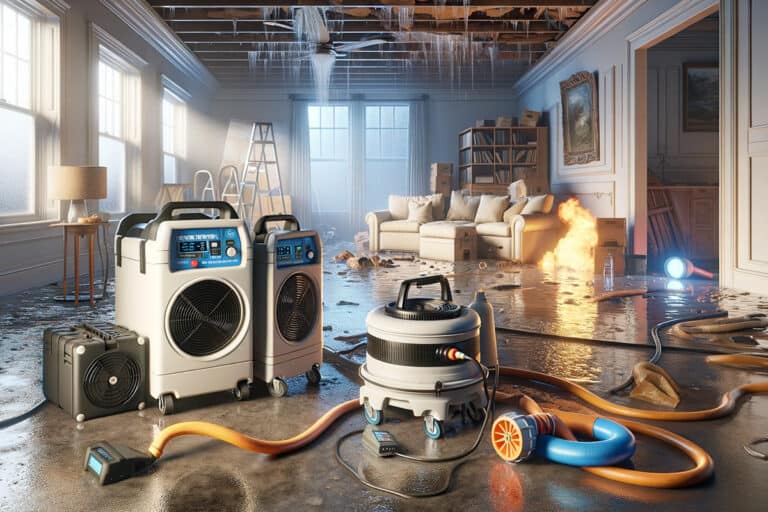
While minor patches prove straightforward weekend projects for many DIYers, extensive drywall replacement requires professional expertise involving:
- Mold remediation and structural reinforcement
- Commercial drying/dehumidifying systems
- Drywall demolition/disposal protocols
- New drywall hanging/finishing
- Matching unique wall texture styles
- Working around electrical and plumbing
Full drywall replacement in a single room often runs $2000 to $4000. Whole-home drywall replacement can cost $15000 or beyond after catastrophic flooding.
When interviewing contractors, ask about their specific experience with water damage projects to gauge their expertise. Checking reviews and requesting a few local referrals also lends confidence in their quality.
Table 3: DIY vs. Professional Repair Comparison
| Factor | DIY Repair | Professional Repair |
|---|---|---|
| Cost | $10-$70+ (depending on damage size) | $50-$100 per hour (plus materials) |
| Scope of Damage Suitable | Minor damages less than 10 sq ft | Multiple rooms or extensive structural damage |
| Skills Required | Basic DIY skills | Professional skills, specialized tools |
| Time Investment | A few hours to a weekend | Varies based on damage extent |
| Mold Remediation | Not recommended | Often necessary for significant damage |
DIY Drywall Water Damage Repair Instructions
Armed with proper safety gear, containment tools, and repair materials, minor patches under 10 sq ft can become simple weekend upgrades for many homeowners. Follow these guidelines:
Before Starting
- Turn off the water at the main home shut-off valve
- Eliminate moisture source completely
- Dry space thoroughly with industrial fans
- Photograph damage for insurance records
- Read safety tips for handling drywall repairs
DIY Safety Gear Checklist
- N95 dust masks
- Work gloves
- Safety goggles
- Ear protection
- Coveralls/protective clothing
- Rubber boots & knee pads
Removing Water-Damaged Areas
- Mark compromised sections with painter’s tape
- Carefully score the perimeter with a razor blade
- Cut out the marked portion fully with a drywall saw
- Pry the piece loose, retaining the existing screws
- Discard in contractor trash bags
- Vacuum/sweep the area thoroughly
Patch Installation & Finishing
- Measure and cut the replacement gypsum section precisely
- Secure firmly into studs and joists with drywall screws
- Apply mesh tape over seams; mud evenly, feathering out
- Let dry fully as indicated on the compound container
- Lightly sand; wipe away dust
- Skim coat again if needed for smoothness
- Prime painted areas before applying the finish coat
With proper tools and attention to seamless matches, repairs can enhance rooms with nearly invisible upgrades.
Table 4: Cost Estimate For DIY Repair Materials
| Repair Type | Materials Needed | Estimated Cost |
|---|---|---|
| Small holes or sections (<1 sq ft) | Patch, joint compound, sandpaper, paint | $10 – $30 |
| Larger patches (up to 4’x8’ sheet) | Drywall sheet, screws, joint compound, tools | $30 – $50 |
| Textured ceiling patch (up to 2’x2’) | Texture spray, joint compound, primer, paint | $70+ |
Preventing Drywall Water Damage
An ounce of prevention equals a pound of avoided repairs when it comes to drywall moisture protection:
- Install interior French drains along basement walls if groundwater seepage occurs
- Check washing machine hoses; replace older rubber models
- Repair minor roof leaks quickly before destruction spreads
- Limit basement dehumidifier levels below 50 percent
- Clean gutters and downspouts twice per year
- Do annual furnace humidifier pad replacements
- Update outdated galvanized interior plumbing
By minimizing excess moisture sources and improving water management, costly damages diminish. Maintaining strict prevention habits preserves home integrity for the long run.
FAQ About Drywall Water Damage Repair
Conclusion
Dealing swiftly and decisively with any signs of drywall water damage preserves both home value and occupant health over time. Implementing responsible repair practices combined with diligent prevention yields peace of mind amid life’s unpredictable circumstances.
Though minor patches may seem simple weekend DIY projects, don’t underestimate underlying risks associated with moisture damage and the value of professional guidance when uncertainty arises. Damage spanning multiple rooms warrants calling remediation specialists to apply commercial-grade drying solutions, reinsulate properly, treat contamination, and ensure structural stability with Code-compliant framing techniques you can’t replicate independently.