Disclosure: I am compensated for purchases made through some links on this site. Click for details.
Water damage in your home can be a daunting challenge. Whether it’s due to natural disasters, plumbing failures, or unforeseen leaks, the aftermath can significantly affect your property and health. Understanding the steps to effective water damage restoration is crucial for a swift and safe recovery. This comprehensive list provides 21 essential tips to help homeowners navigate through this tough situation.
1. Evaluate the Situation
When facing any water emergency, your first move is to fully evaluate the situation. Survey all areas exposed to water, checking for:
- Water Source: The first step in water damage restoration is pinpointing the source. Is it a burst pipe, a leaking roof, an overflowing appliance, or flood water?
- Contamination Levels: Is it clean water (from rain or leaky faucets), gray water (from appliances, containing chemicals), or black water (sewage or floodwater)? Identify health risks. Knowing the category of water damage helps tailor your restoration approach.
- Structural Issues: Flooding can destabilize foundations and cause collapse hazards. Carefully inspect for cracks or shifts.
- Severity: Note details like water source, readings on electric/gas meters, and saturation of materials.
If unsure about safety or if the damage is severe, bring in professional restoration services. They have specialty equipment and the expertise to assess tricky situations.
2. Wear Protective Clothing
Before diving into cleanup, gear up for safety. Wear gloves, goggles, and head protection, and consider using respiratory protection, especially when dealing with potentially contaminated flood water. Remember to properly clean and disinfect all equipment and yourself post-cleanup.
3. Health and Safety Considerations
Throughout the restoration process, prioritize your health and safety. In environments with potential contamination or structural risks, take all necessary precautions.
4. Document Conditions
Documenting the damage is critical for insurance claims. Before removing any water or disposing of damaged goods, thoroughly document the conditions.
Take detailed photos, videos, and written notes of the affected areas, noting the water type and any visible damage. These records of damaged and undamaged items will be support a comprehensive insurance claim and restoration plan.
It is very easy to lose track of what you are documenting like whether the closeup photo of a water stain is on the ceiling of the master bedroom or secondary bedroom. As a former insurance adjuster, I quickly learned that you need to take notes on every photo you take. Luckily, many smartphones will allow you to make notes on each photo.
I know that slows down the process and seems tedious, but it will be important later when documenting your insurance claim.
5. Turn Off Water and Power
For safety, turn off water and power sources in the affected area. This step prevents additional damage and reduces the risk of electrical hazards. Locate your main water valve and circuit breaker. Remember, safety first – wear rubber gloves and boots.
6. Contacting Your Insurance Company
After stabilizing the situation, contact your insurance provider. Remember to document the damage thoroughly with photos, video, and notes. Understand your policy coverage and work cooperatively with insurance adjusters.
7. Hiring a Professional Service
For extensive water damage, hiring a professional restoration service is advisable. Look for licensed, insured, and experienced professionals. They can efficiently handle complex restoration tasks and guide you through insurance processes.
8. Check Electrical and Gas Systems
Ensure safety by having a professional inspect electrical and gas systems before turning them back on. This step is crucial to avoid potential hazards post-water removal.
9. Remove Excess Water and Moisture
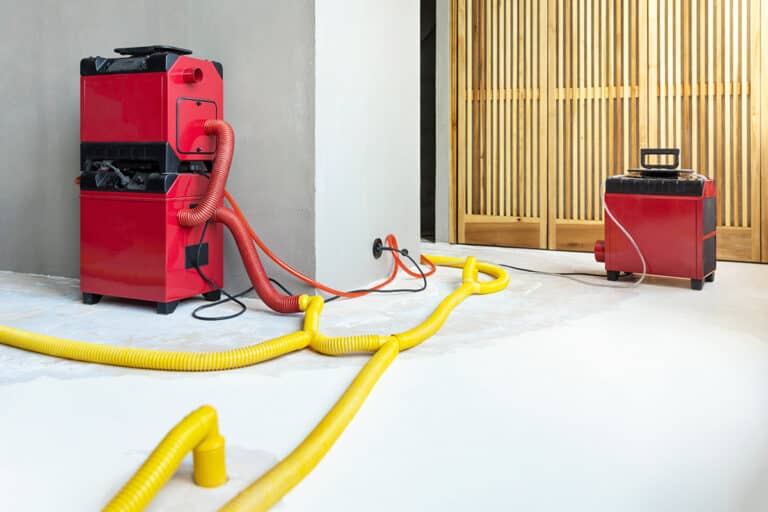
This step is about controlling the environment to expedite drying. Speedy removal of water is crucial in preventing mold growth. Open windows and doors and use pumps, wet vacuums, dehumidifiers, fans, and absorbent materials like towels to remove water and moisture. Aim fans outward to prevent the spread of mold spores and monitor the humidity levels with a hygrometer.
10. Thorough Drying
Employ air scrubbers and specialty drying machinery to eliminate moisture thoroughly. Monitor the process using moisture meters. Be aware that materials like drywall and insulation may need to be removed to fully dry structures. Use extreme caution, as rapid drying can damage some materials.
11. Dispose of Contaminated Materials
Discard porous permeable items and materials that have been exposed to mold or sewage. These are often non-salvageable and continue emitting microbes to pose health risks if retained. Examples are:
- Drywall, carpeting, padding, upholstery with mold
- Non-valuable paper items
- Furniture containing particle board or pulp
Double bag and seal discarded materials, label contents as hazardous waste, and adhere to local regulations for disposing of contaminated materials.
12. Checking for Mold and Mildew
Mold and mildew pose serious health risks. After drying, inspect your home for any signs, like visible mold patches, musty odors, or moisture on cool surfaces signaling areas promoting mold. If you suspect mold growth, consider using a mold test kit for confirmation.
Remediation generally requires professionals possessing gear for safely handling toxic spores.
13. Removing Mold and Mildew
If you find mold, act quickly. Use appropriate cleaners for mold removal and consider air purifiers to tackle airborne spores. Wear protective gear to avoid exposure during the process.
14. Clean and Disinfect
Once the water is removed, it’s time to clean and disinfect. Use mild, eco-friendly detergents for hard surfaces and stronger agents like hydrogen peroxide, vinegar solution, or diluted bleach for thorough sanitization. Ensure good ventilation during this process.
15. Make Repairs
Inspect your property for irreparably damaged areas. Replace damaged flooring, drywall, insulation, and other damaged structures to restore your home’s integrity. Check for underlying issues that may have caused the water damage, like broken pipes or exterior leaks before rebuilding. For major repairs, hire specialized contractors – they understand optimal restoration techniques and materials.
16. Preventing Future Water Damage
Prevention is key. Regularly inspect plumbing, maintain appliances, and check roofs and foundations for leaks. Consider installing water sensors and sump pumps for early detection and prevention of water damage.
17. Reassess and Revise Plans
Use your experience to reassess and improve your emergency and restoration plans. Reflect on what worked well and what areas need enhancement for better future preparedness.
18. Prepare for Future Incidents
Stay prepared for any future water damage by stocking up on emergency supplies and restoration equipment. Keep humidity sensors, air scrubbers, protective masks, and gloves on hand for rapid response and protection during mitigation and restoration.
19. Secure Financial Assistance
Document all damages thoroughly for insurance purposes. If necessary, explore financial assistance options like:
- Government disaster assistance if a declared emergency
- Personal loans to cover restoration costs
- Financial aid to bridge gaps if struggling
20. Community Resources and Support
Leverage community resources for additional support. Sharing your experiences can benefit others in similar situations and foster a sense of community resilience.
21. Follow-Up Inspections
Schedule follow-up inspections to ensure the integrity and thoroughness of the restoration work. Address any overlooked issues promptly to secure your property’s long-term safety and value.
Conclusion
Navigating through water damage restoration can be overwhelming, but with a methodical approach and the right knowledge, you can effectively manage the situation. These 21 tips provide a roadmap for homeowners to not only restore their property but also to ensure their safety and
Stay observant, document thoroughly, focus on health/safety, and don’t hesitate to seek professional guidance when situations prove overwhelming.
With perseverance and help when needed, it’s possible to emerge from even extensive water damage stronger and more disaster-ready than ever.